「Jointogether」を使うと、複数の画像を自由に配置して1枚の画像にする事ができる。
このような作業は、オークションなどの限られたスペースで多くの情報を出したい場合(縦方向)やスマートフォンのスクリーンショットを並べてブログを書きたい場合(横方向)などに便利だろう。あるいは、結婚式などの記念用に、起立した縦長の写真を大きく配置して、その横に関連する写真を小さく配置してもよいし、1つの写真に小さな装飾用の画像パーツ(キャラクタなど)を挿入して装飾するのも良いだろう。
「Jointogether」では、画像内に自由に別の画像を配置できるが、単純に画像を縦や横に並べれば良いだけの場合は、「複数の画像を縦・横に並べて1つの画像にする – 画像連結」も参考にされたい。
ダウンロード
「Jointogetherのダウンロード : Vector ソフトを探す!」から「jointogether43.zip」をダウンロードする。
スポンサードリンク
※Windows7 64bit で試用した
ファイルの展開
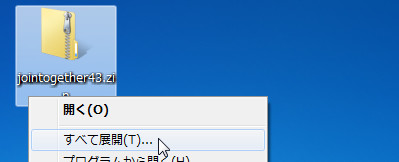
ダウンロードした「jointogether43.zip」を解凍する。
準備
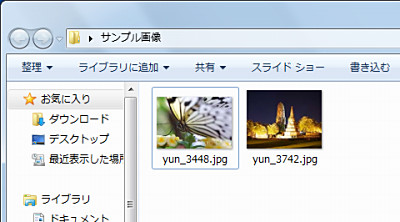
予め画像を準備しておく。今回は、「ゆんフリー写真素材集」から素材を拝借した。
使い方
起動のしかた
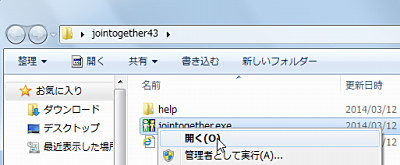
「jointogether.exe」を実行する。
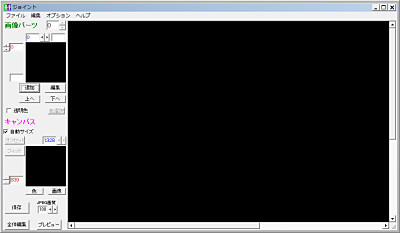
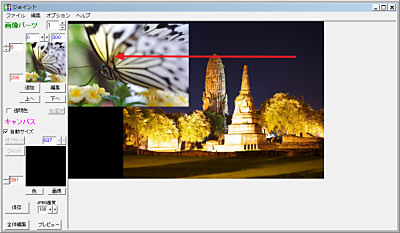
起動したところ。
写真の追加(1)
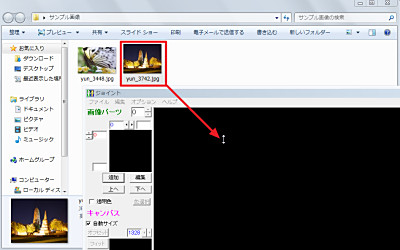
任意の画像をドラッグ・アンド・ドロップする。
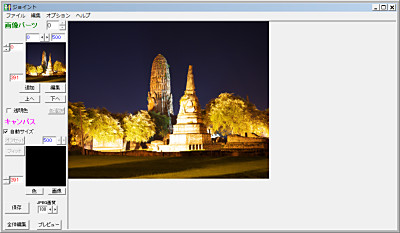
画像が追加されたところ。
画像の追加(2)
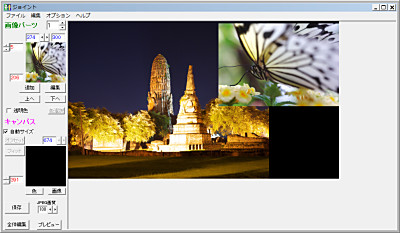
同様の手順で画像を追加する。
あとは任意の位置に移動させ、あるいは大きさを調整すれば出来上がる。
画像の保存
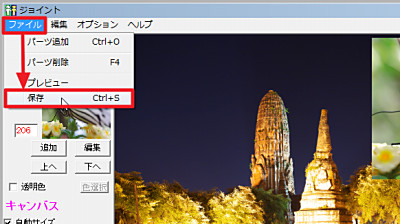
好みの状態になったら、 ファイル - 保存 として保存する。

指定した場所にファイルが保存されたことを確認する。
保存した画像の確認
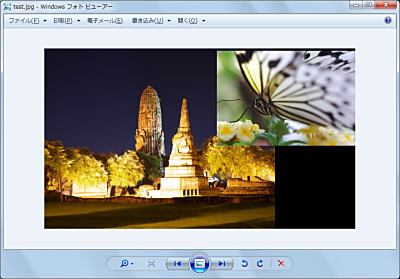
保存した画像ファイルをWindows フォト ビューアーで表示したところ。
そのほか
画像の再配置
画像の位置は、あとから調整することができる。
マウスを使って簡単に移動する方法のほか、おそらく数値による座標指定でも移動できると思われる。
写真の大きさを変更
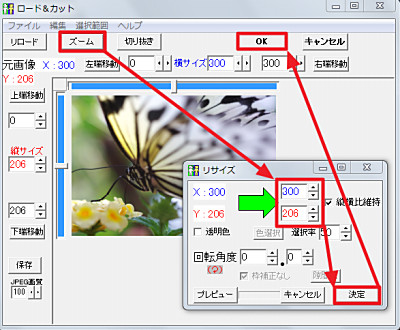
写真の大きさを変更するには、 画像パーツの下にある「編集」をクリックすると編集画面(ロード&カット)が表示される。
この画面内の「ズーム」をクリックするとリサイズができるので、任意の大きさを指定して「決定」をクリック、「OK」をクリックして閉じる。
そのほか、切り抜きなどいくつかの作業が行えるようになっている。
スポンサードリンク
コメント