DVDStyler は動画ファイルをメニュー付きDVD にできるソフトウェア。
ダウンロード
「DVDStyler Portable | PortableApps.com – Portable software for USB, portable and cloud drives」
※DVDStylerPortable_2.1.paf.exe を試用した
スポンサードリンク
「PortableApps.com Platform」を使う方法もオススメします。
インストール
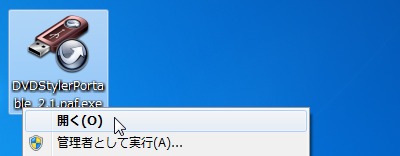
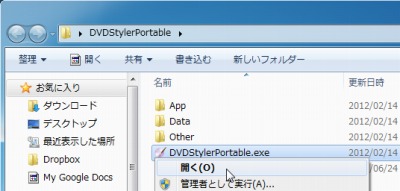
ダウンロードしたDVDStylerPortable_2.1.paf.exe を実行する。
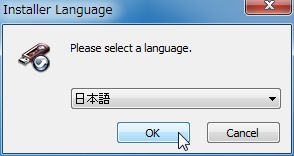
インストーラーの言語を選択する。

次へをクリックする。
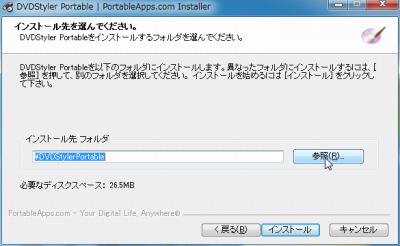
参照をクリックする。
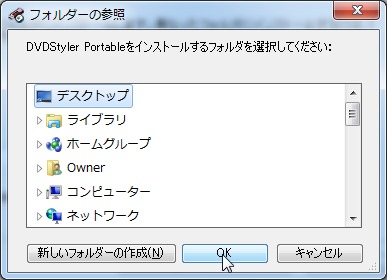
インストール(解凍)先フォルダを指定する。
ここではデスクトップを選択してOKをクリックした。
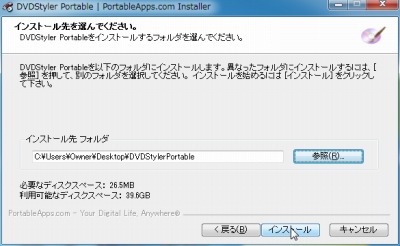
インストールをクリックする。
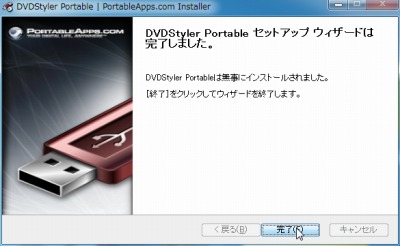
完了をクリックする。
使い方
起動のしかた
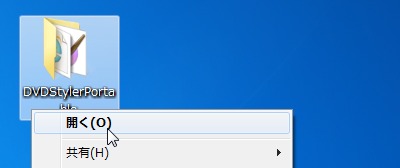
デスクトップに作られたDVDStylerPortable フォルダを開く。
DVDStylerPortable.exe を実行する。
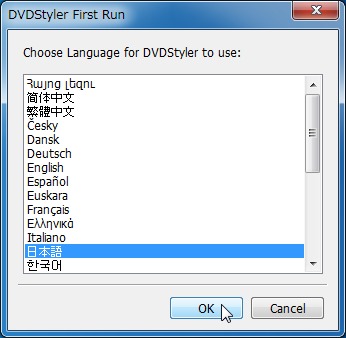
日本語を選択してOKをクリックする。
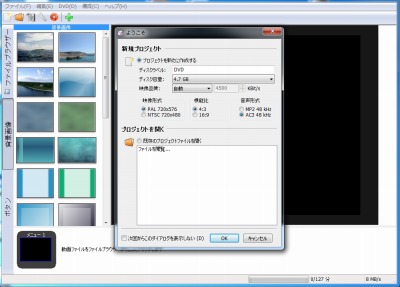
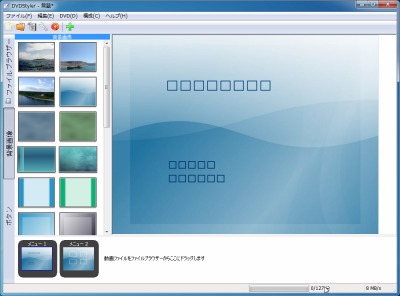
起動したところ。
映像形式の選択
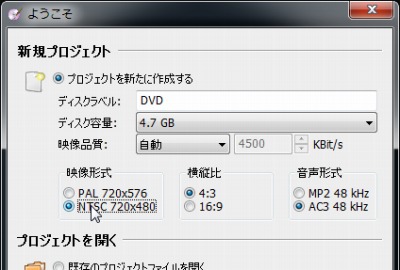
標準ではPAL 形式になっているのでNTSC を選択するのを忘れずに。(後述する標準設定を変更しておくことを推奨)
標準設定の変更
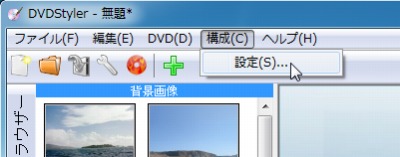
構成から設定を選択する。
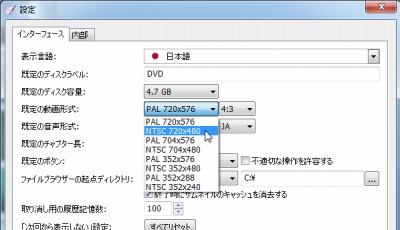
既定の動画形式をNTSC のものを選択する。必要があれば4:3 や16:9 なども選択しておく。
文字化け対処
メニューが文字化けしている。
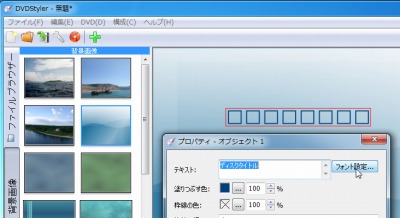
文字を選択、右クリックからプロパティを選択。フォント設定をクリックする。
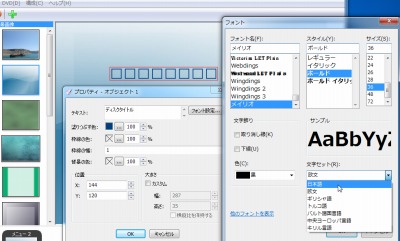
日本語に対応する任意のフォントを選択すれば文字化けが直る。
ただし見たところ既定のフォント設定が見当たらなかったため、日本語を扱う場合は毎度選択する必要があるかもしれない。
→ 参考:pc.casey.jp » 動画ファイルを簡単にDVDにする – DVDStyler
スポンサードリンク
コメント